
You Deserve The Top Home Inspection Experience In Orlando Florida!
Welcome to Top Inspectors!
As a family-owned business, we offer meticulous inspections and unparalleled customer service. We're passionate about giving you peace of mind and confidence for big decisions!


You Deserve The Top Home Inspection Experience In Orlando Florida!
Welcome to Top Inspectors!
As a family-owned business, we offer meticulous inspections and unparalleled customer service. We're passionate about giving you peace of mind and confidence for big decisions!
You Deserve the Best, & We're Here to Help!
At Top Inspectors, we guide you through the home-buying process with high-quality education and reassurance, ensuring you feel confident and supported.
Our commitment extends beyond the inspection report—we’re here for your entire home ownership journey, offering advice, education, and support. Your peace of mind is our promise.
Inspection Services in Florida

Home Inspection
A home inspection is essential in securing your investment and ensures safety. We provide thorough evaluations and clear insights for informed decisions and peace of mind.

Pre-Listing Inspection
Pre-sale home inspections identify and address issues, ensuring a smoother sale and building buyer trust. We provide clarity to sell your home quicker and eliminate surprises.

New Construction Inspection
Many believe new homes are issue-free, but this isn't always true. Overlooked problems can lead to unexpected costs and stress. Let us help identify potential issues so your builder can address them promptly.

Four-Point Inspection
Most insurance companies require a four-point inspection for homes over ten years old. This provides them with a quick overview of the home for insurance purposes.

Wind Mitigation Inspection
Homes with features that withstand high winds or severe storms, like hurricanes, may qualify for significant insurance discounts.
Our Reports Are High-Tech Yet User-Friendly & Easy to Read!

Our service is dedicated to making your home inspection smooth and reassuring, with interactive, user-friendly reports crafted using the latest technology.
What sets us apart is our clear, easy-to-understand reports, ensuring you feel confident and informed at every step, helping you make the best decisions for your home,with reports that speak to you—not at you.
WHAT WE INSPECT
Choosing Top Inspectors means you’re with licensed professionals dedicated to thoroughly examining your home. Our limited visual inspection covers over 1,800 items, and you’ll receive a detailed digital report with photos afterward. We're passionate about your peace of mind and ensuring you fully understand your home's condition.

You Get More Than Just a Home Inspection! All This Comes FREE With Your Inspection!

FREE 90 Day Home Warranty!
If something breaks after an inspection most inspectors say...
Too Bad! We say it's covered at a $0 deductible!

FREE 90 Day Underground Water Line Guarantee!
Free coverage for supply and sewer lines
Up to $3,000 included with every home inspection!

FREE 90 Day Mold Warranty!
If you spot visible mold in your home after the inspection, we will pay to remediate it
Up to $2,000 included with every home inspection!

FREE Appliance RecallChek!
1 in 5 Homes has a recalled appliance. We check for those hidden defects so AFTER CLOSING the manufacturer will fix or replace it for FREE!

FREE 5 Year Roof Leak Free Guarantee!
If it doesn't leak at the inspection, it won't leak for the next five years or we'll fix it!

FREE 12 Month Structural Warranty!
Free coverage for structural components such as foundations, support members and roof systems.
Up to $100,000 with every home inspection!
We Honor and Support Our Heroes!
Are you Military, Police, Firefighter or First Responder?
You get a discount!
Just ask about our service discount when booking.
Thank you for your selfless service!

Thank You To Our Amazing Customers!
How Top Inspectors Puts You First!

200% Guarantee!
If you are not completely satisfied by the end of the inspection, we will give you a full refund AND pay a licensed inspector of your choice to perform another inspection!

We value your time, so we make the process seamless from booking to receiving your detailed report, ensuring a stress-free experience!

Still have questions or facing maintenance issues? Our FREE Home Owner’s Resource service connects you with professionals ready to help, ensuring you get the guidance and expertise you need.
Qualifications We Have to Ensure You Get Top Quality Service!
Your peace of mind is our passion. Our inspectors train rigorously with ASHI Certified Inspectors to ensure they meet the highest standards, providing thorough, accurate, and reliable home inspections you can trust.
As FABI members, we complete over 40 hours of annual education tailored to Florida's unique building needs and climate, ensuring the most accurate, up-to-date information to keep your property and family safe.

We know inviting someone into your home requires trust. All our inspectors undergo extensive background checks, ensuring they are highly qualified, trustworthy, and reliable. Your safety and peace of mind are our passion!
Helpful Articles Just For You!
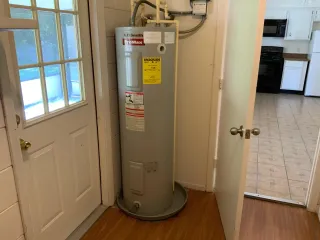
Keep Your Water Heater Running Smoothly: A Step-by-Step Guide to Flushing
Learn how to keep your water heater running efficiently with our step-by-step flushing guide. Extend its lifespan and save on energy costs with these expert tips! ...more
Home Inspections ,Home maintenance
July 31, 2024•3 min read
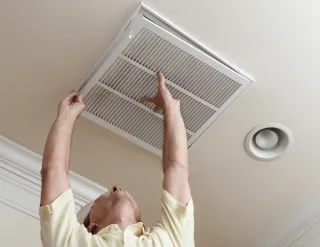
Why HVAC Filter Maintenance is Key to a Healthy Home
Changing your HVAC filter is critical for both your comfort and your system's efficiency. All Florida homes need regular upkeep and maintenance throughout the year. ...more
Home Inspections ,Home maintenance
July 11, 2024•3 min read
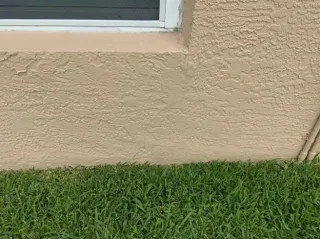
When Should I Be Worried About Stucco Cracks?
Many people don’t realize that even very small cracks can allow moisture intrusion, leading to bigger issues down the road. So, when should cracks in your stucco be repaired? ...more
Home Inspections ,Home maintenance
July 07, 2024•4 min read
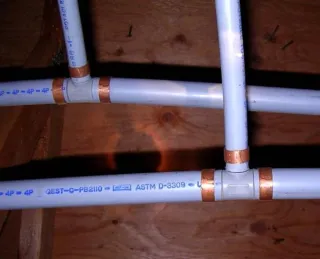
What Is Polybutylene Piping?
Although polybutylene piping used to have many benefits such as cost efficiency and ease of installation, there are significant issues associated with its use now. ...more
Home Inspections ,Home maintenance
July 06, 2024•3 min read

Strength and Style: Protecting Your Florida Home Through Design
Different roof shapes exhibit varying levels of resilience against intense weather conditions, providing better or lesser protection for your home. ...more
Home Inspections ,Home maintenance
July 03, 2024•4 min read

Should my House in Florida have gutters?
Do I Really Need Gutters? We get asked this question on home inspections all the time. The simple answer is… yes you really should have gutters. ...more
Home Inspections ,Home maintenance
July 01, 2024•2 min read
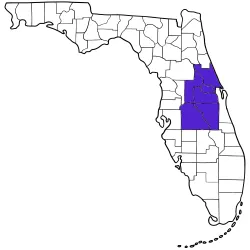
Areas We Serve In Central Florida
Counties We Serve:
Orange
Seminole
Lake
Volusia
Osceola
Polk
Key Cities We Serve:
Orlando, Kissimmee, Altamonte Springs, Apopka, Sanford, Ocoee, Oviedo, Clermont, Winter Garden, Winter Park, Davenport, Leesburg, Winter Haven, St. Cloud, Haines City Deltona, DeBary, DeLand, Daytona
Frequently Asked Questions
Why should I get a home inspection?
Buying a home is an important milestone and a significant investment. Whether it's your first house or you've been through the process before, ensuring you're making the right choice is crucial. That's where a home inspection comes in! Rather than stepping into the unknown, wouldn't you rather make an investment you can trust? Our certified and licensed home inspectors bring their expert knowledge to examine every detail of your prospective home, providing you with the confidence and peace of mind you deserve. Let us take the worry off your shoulders and help you make an informed decision!
Can a house fail a home inspection?
No, a house cannot "fail" a home inspection. A home inspection is a visual examination meant to identify any deficiencies or defects in the property. The goal is not to assign a pass or fail grade to the house but to provide you with detailed, objective information about its current condition. This valuable insight helps you make well-informed decisions, ensuring that you are fully aware of any potential issues before moving forward. Rest assured, our goal is to equip you with the knowledge you need to feel confident in your investment.
How long does a home inspection take?
A typical home inspection usually takes about 3 to 4 hours. The duration can vary based on several factors, including the size, age, and condition of the home. Our goal is to conduct a thorough and detailed inspection to ensure you have a complete understanding of the property's condition. We appreciate your patience as we work to provide you with the most comprehensive information possible.
How much does a home inspection cost?
The cost of a home inspection can vary based on a few factors, including the size of your home and any special considerations you may need. Generally, our pricing is determined by the square footage of your property. On average, you can expect the inspection to cost between $300 and $500 for a typical single-family home.
Additionally, we offer specialized services such as 4-Point insurance inspections and wind mitigation inspections. These are often required for homeowners insurance and can provide significant savings on your insurance premiums. The cost for these additional inspections can vary but are typically affordable and provide valuable insights into the safety and integrity of your home.
Our goal is to provide you with a thorough and comprehensive inspection at a fair price. We understand that buying a home is a significant investment, and we're here to ensure you have all the information you need to make an informed decision. If you have any concerns about the cost or the inspection process, please don't hesitate to reach out.
When should I schedule my inspection?
We recommend reaching out as soon as you make your offer on the home. That way we can get you scheduled within your inspection period. Don't worry, we usually have availability in1-3 days.
When will I receive the report?
The primary inspection report, along with any additional service reports, will be completed and sent to you on the same day as the inspection. Reports are generally sent between 5 PM and 8 PM and will be accessible once the inspection agreement is signed and payment is received. If it takes longer than 24 hours, the inspection is FREE!
Is a re-inspection required by the inspector after repairs are completed?
For a four-point inspection, most insurance companies will require a "clean" report before insuring the home. If deficiencies are noted, and repairs are made by the seller, an inspector must return to verify the repairs. A new four-point report will then be sent to you for your insurance company.
For a full home inspection, you may choose to have a repair verification inspection to ensure that the seller professionally addressed the deficiencies. However, this is optional.
In either case, a trip charge applies if the inspector needs to return to verify repairs.
How much will the repairs cost?
Home inspectors are generally not qualified to provide repair or replacement cost estimates on-site or within the inspection report. Many specialized services, however, utilize national and local data to estimate these costs based on the inspector's findings.
Schedule Now